Introduction
Online shoppers cannot pick up your product, turn it over, or inspect its finish. Your visuals must help them do the next best thing: understand what they are buying and imagine how it fits into their lives.
For marketing agencies, e-commerce businesses, manufacturers, and consumer brands, that makes product presentation a business priority. An attractive image earns attention. An informative image helps answer questions. A coordinated set of visuals supports the journey from discovery to purchase.
Photorealistic 3D product rendering brings these goals together. It allows teams to present products through carefully planned digital images, using accurate models, realistic materials, and controlled lighting.
This guide explores how to use those images across online stores and advertising campaigns, where outsourcing can help, and how to measure results without relying on exaggerated promises.
What Is Photorealistic Product Rendering?
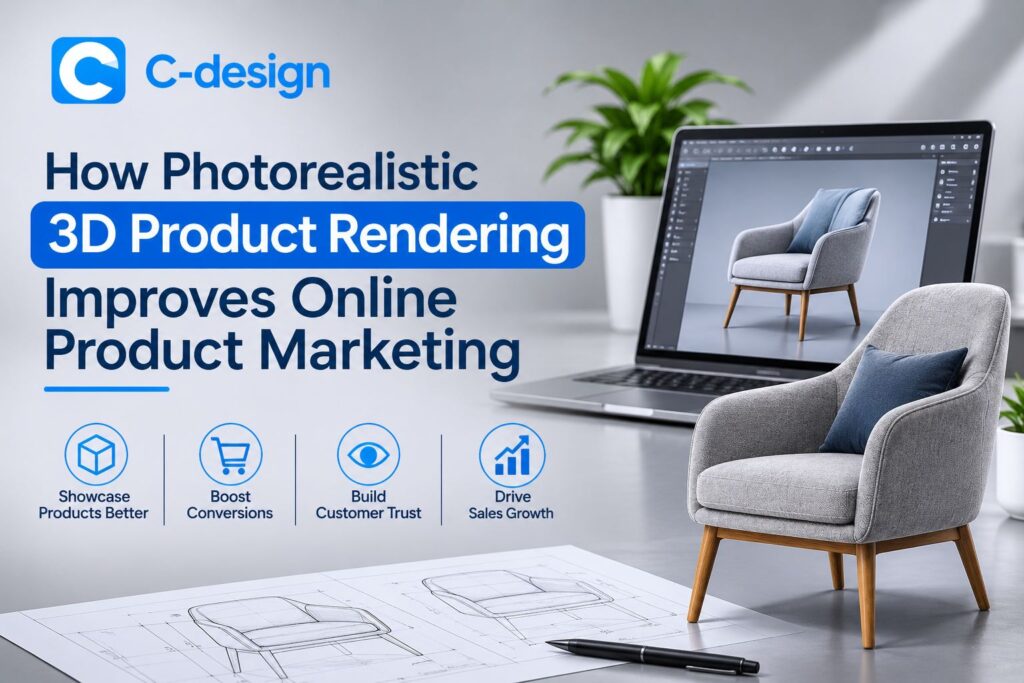
Photorealistic 3D product rendering creates lifelike images from digital product models. Artists build or prepare the product geometry, develop its surface appearance, and arrange lighting and cameras before generating the final image.shopify
The aim is not simply to make something look impressive. A useful marketing render must represent the actual product faithfully: its proportions, finish, labeling, components, and approved configuration.
It is also important to distinguish the outputs. A rendered product image is normally a static picture. A 360-degree sequence provides a series of views. An interactive 3D model allows shoppers to control the viewing angle in a compatible viewer.
Choose the format that solves your marketing problem. A campaign banner may need one striking composition, while a product page may need several informative views and detail images.
Why Visual Clarity Matters Online
A shopper considering a desk lamp might wonder whether the switch is easy to reach, how the base looks, and whether the finish suits their room. A single front-facing image cannot answer everything.
Plan your visuals around these buying questions. Start with an overall view, then add angles and close-ups that reveal genuinely useful information. Pair images with dimensions and accurate descriptions rather than expecting pictures to communicate every specification.
For marketing teams, this creates a stronger creative brief. Instead of requesting “more attractive images,” ask what each asset must explain and where the customer will encounter it.
The result is a presentation designed for understanding, not just decoration.
Seven Marketing Advantages
Create a Compelling First Impression
Your product often appears beside competing offers in a crowded feed or category page. Give the hero image a clear focal point and enough visual space to remain understandable at small sizes.
With a 3D scene, the creative team can adjust camera position, background, and lighting before committing to the final composition. Use that flexibility to emphasize the product rather than overwhelm it with effects.
For example, a skincare brand might choose a clean composition that makes the bottle shape and label readable. A power-tool manufacturer may prefer an angle that clearly reveals the grip and working end.
Keep the promise honest. Do not improve the apparent finish, scale, or included accessories beyond what customers will actually receive.
Show Details From Multiple Angles
Strong product marketing does not hide the practical details. Plan views that show the back, sides, underside, controls, closures, or connection points when they matter to the buying decision.
Detailed renders can illustrate a chair’s stitching, a speaker’s control layout, or the construction of a packaging lid. Each image should add information rather than repeat an almost identical view.
Once the underlying model is approved, different camera views can be prepared from the same digital scene. Agree on those views in advance so the team does not spend time producing unnecessary outputs.
Where internal features are shown through cutaways or exploded views, label them clearly as explanatory illustrations. They should not be mistaken for the product’s normal external appearance.
Encourage Meaningful Customer Engagement
Think of engagement as useful exploration, not simply longer time on a page. A shopper who finds the relevant detail quickly may have a better experience than someone who spends several minutes searching.
Build an image sequence with a purpose: introduce the product, explain important features, show a relevant setting, and clarify the available options.
Interactive models can offer another way to explore, but they are separate deliverables from static renders. Shopify requires suitable theme support or customization to display 3D models and videos.
Before adding advanced media, test it on the devices your audience uses. A simpler, faster presentation may serve customers better than an elaborate experience that performs poorly.
Build Purchase Confidence
Purchase confidence comes from knowing what to expect. Use approved dimensions, authentic material references, correct labels, and accurate accessory combinations when preparing your visual assets.
Show the exact variant being sold. If customers select a different color or configuration, ensure the associated image matches that choice. A beautiful generic image is not enough when the details affect the purchase.
Realistic presentation also requires restraint. Do not remove visible seams, conceal normal components, or exaggerate a finish to create an appearance the manufactured product cannot match.
Support the visuals with measurements, specifications, and clear delivery information. Rendering can contribute to confidence, but it cannot replace the other information needed for an informed decision.
Reduce Repeated Photography Work
Photography and rendering are complementary tools, not automatic substitutes. Compare them against the actual product range and the outputs your campaigns require.
A digital workflow can be useful when many approved variants share the same geometry, or when teams need repeatable camera angles and backgrounds. Updating a material or scene may avoid arranging another physical shoot, provided the underlying model remains accurate.
However, the first model, material development, rendering, and revisions all cost money. Highly complex surfaces or changing designs can require significant production work.
Build a total-cost comparison that includes reference preparation, styling, shipping, studio work, retouching, licensing, modeling, review, and future updates. Savings depend on the project—not on choosing 3D alone.
Strengthen Multichannel Campaigns
An online store, social advertisement, email banner, and distributor presentation require different compositions. Plan these destinations before production rather than stretching one finished image into every layout.
Create a deliverable list covering aspect ratios, product placement, background requirements, copy space, and resolution. Keep the approved product appearance consistent while adapting the surrounding composition.
For agencies, this gives account teams a clearer system for managing client feedback. Product accuracy can be approved separately from campaign styling, helping prevent every creative revision from reopening technical decisions.
Review marketplace rules individually. Do not assume that lifestyle backgrounds, text overlays, or additional props accepted in an advertisement are also permitted in a marketplace’s main listing image.
Support Conversion Testing
Treat improved conversion as a hypothesis to test, not a guaranteed result. Better visuals cannot compensate automatically for unsuitable pricing, weak demand, delivery problems, or a difficult checkout.
Choose a specific question. Does a close-up of the fastening mechanism help buyers? Does a lifestyle scene make the product’s purpose clearer? Does the revised hero image attract more qualified clicks?
Where practical, compare image treatments while keeping other important conditions stable. Review product-page conversion, add-to-cart activity, advertising efficiency, and customer questions together.
Avoid declaring success from a short-lived increase in clicks alone. A useful creative change should support the business outcome you intended to improve.
Match Images to Buying Stages
At the awareness stage, use a focused visual that introduces the product and its main use. Keep the composition understandable even when it appears briefly on a mobile screen.
During consideration, answer practical questions through alternate angles, feature close-ups, and carefully chosen context. For example, a storage product may need a view showing its openings and internal compartments.
Near purchase, prioritize accuracy and reassurance. Show the selected variant, clarify what is included, and support the image with dimensions and specifications.
After purchase, approved digital assets may also help illustrate setup or care instructions. Keep instructional graphics distinct from promotional imagery so customers understand their purpose.
How Outsourced Rendering Works
Define the Marketing Brief
Begin with your audience, channels, product list, intended message, and deadline. Identify which images must explain details and which are designed primarily for campaign impact.
Provide brand guidelines and useful visual references, but explain what you like about them. “Use a clean background with generous copy space” is more actionable than “make it premium.”
Assign an internal owner to combine stakeholder feedback. This helps the external team receive clear instructions rather than contradictory comments from several departments.
Share Accurate Product References
Supply available CAD files, drawings, dimensions, product photographs, packaging artwork, and material references. Identify approved information and flag provisional details.
Include images of unusual surfaces or components. A vague description such as “silver metal” may not explain whether the finish is brushed, polished, coated, or textured.
If a prototype differs from the final product, document the differences. The artist should not have to guess which reference takes priority.
Approve Geometry and Materials
Review the basic model before detailed image production. Check proportions, components, edges, openings, and label placement against the agreed references.
Next, review material appearance under appropriate lighting. Pay particular attention to transparency, gloss, fabric texture, and reflective surfaces.
Approve a representative sample before producing a large batch. This creates a shared benchmark and reduces the risk of repeating an error across an entire campaign.
Produce Campaign-Ready Views
Once the product representation is approved, develop the required camera angles, backgrounds, lighting setups, and lifestyle scenes.
Group related outputs so the team can maintain consistent presentation. Request separate deliverables where needed for product pages, ads, catalogs, and regional versions.
Keep revision requests specific and distinguish product corrections from new creative directions. Changes to the approved design may affect cost and delivery timing.
Check, Deliver, and Reuse
Before publishing, verify image dimensions, variant labels, naming, crops, and visual accuracy. Confirm that web assets are appropriately compressed without losing important detail.
Agree in writing on source-file ownership, licensing, confidentiality, and future update arrangements. Access to a final image does not necessarily include ownership of every underlying production file.
Maintain an organized asset library containing approved versions and product identifiers. Reuse becomes much easier when marketing teams can locate the correct file confidently.
An Illustrative Consumer Brand Example
Imagine a home-appliance brand preparing an online campaign for a new coffee machine. Its agency needs a hero advertisement, the e-commerce team needs detailed listing images, and distributors need presentation visuals.
The brand begins with approved product data and a shared brief. After checking the model and materials, reviewers approve an overall view, a control-panel close-up, and a side angle showing the water reservoir.
The campaign team then develops a kitchen scene, while the commerce team receives simpler backgrounds and informative product views. The product remains consistent even though the compositions serve different purposes.
This is an illustrative workflow, not a client case study or a promised commercial result. Its value lies in coordinated decisions, accurate references, and planned asset reuse.
Why Consider Outsource 3D Modeling?
C-Design’s website presents product visualization, 3D modeling, furniture modeling, and AR/VR capabilities for industries including manufacturing and industrial design.
For prospective clients, the practical advantage to explore is whether those capabilities can support a connected production brief. Discuss the full path from source information to approved marketing assets rather than requesting an isolated image without delivery requirements.
Marketing agencies can ask about adapting approved assets for several client channels. E-commerce teams can prioritize catalog consistency and variant accuracy. Manufacturers can focus on interpreting technical references, while consumer brands can define the desired visual identity.
Start with a representative pilot and clear acceptance criteria. Ask for relevant portfolio examples, a scoped quotation, a review schedule, and a realistic delivery plan. This lets your team evaluate fit before commissioning a larger campaign.
Avoid These Common Mistakes
A successful rendering project needs both creative quality and production discipline. Use this checklist before approving final images:
- Do not exaggerate product size, finish, or performance.
- Match each image to the correct SKU and variant.
- Identify props or accessories that are not included.
- Check text, logos, and packaging artwork carefully.
- Reserve space for campaign copy before rendering.
- Test crops and readability on mobile screens.
- Confirm platform requirements before final exports.
- Record approvals and preserve version history.
Also be cautious with excessive retouching. Marketing imagery should help customers understand the product, not create an idealized version that undermines trust when the order arrives.
Measure What Actually Improves
Set a baseline before replacing your existing visuals. Record the relevant traffic sources, product-page activity, advertising results, and common customer questions.
During testing, separate production outcomes from sales outcomes. Faster approvals and fewer reshoots indicate workflow improvements. Changes in conversion require a more careful assessment of the customer journey.
Review creative results alongside page speed and image delivery. Very large files can undermine the experience you are trying to improve. Publish assets appropriate to their display context rather than uploading maximum-resolution files everywhere.
Use what you learn to guide the next production brief. The most valuable rendering program is a repeatable process for creating accurate, useful, and commercially relevant product content.
Make Every Product View Count
Your next campaign needs more than attractive images. It needs visuals that explain your products, reflect your brand, and work together across every customer touchpoint.
Turn your product ideas into realistic, marketing-ready visuals with Outsource 3D Modeling.
Visit www.outsource3dmodeling.com to discuss your requirements and request a tailored quote. Share your product references, required views, campaign channels, and delivery date so the conversation starts with your actual marketing needs.
Show the details. Tell the product story. Give customers a clearer reason to choose your brand.
Frequently Asked Questions
1. What is photorealistic 3D product rendering?
It is the creation of lifelike product images from digital models. Geometry, materials, lighting, and cameras work together to represent the product’s approved appearance.
2. Can 3D rendering improve e-commerce conversions?
It can support clearer product communication, but higher conversion is not guaranteed. Test the visuals alongside pricing, traffic quality, page performance, and other factors affecting purchase decisions.
3. Is rendering cheaper than photography?
It depends on complexity, volume, variations, and reuse. Compare complete project costs, including modeling and revisions, rather than assuming every rendered image will cost less than a photograph.
4. What files should we provide?
Provide available CAD files, technical drawings, dimensions, product photographs, material references, and approved artwork. Specify required views, backgrounds, formats, and campaign destinations in the brief.
5. Can one model support several campaigns?
Often, yes, if it remains accurate and the usage agreement permits reuse. New variants, geometry changes, different outputs, or interactive applications may require additional production work.
6. Are rendered images the same as interactive 3D?
No. Static renders are images. Interactive models need a compatible viewer and suitable asset preparation. Confirm separate requirements before commissioning interactive or AR content.
7. How do we start with Outsource 3D Modeling?
Visit the website and share your product information, audience, campaign goals, deliverables, and timeline. Ask for a tailored scope and discuss a pilot to establish the required visual standard.
Tags
Related Blogs
Art assets in different styles like 2D art for interactive applications, Games, and UI. We are having more than 15 years of experience